I made this Frankie Frame with the top of a basic square box in Cricut Design Space. It is made of Black Recollections 80lb cardstock.
I used many different Doodlebug Design Collection Papers for the backgrounds and elements. I cut cute little candy pieces out to decorate this.
For the pumpkins I used Bazzill Two Scoops paper in orange sherbet.
I tore out Frankies and the ghost out with thick mulberry paper. Chalked it all and pieced it together.
I embellished this with sequins from Craftin Desert Diva's and added a single jack-o-lantern cabochon.
I made this for Mindy, My Bestie. She has a thing for Kawaii Candy. My entire inspiration for this project was based on the Doodlebug Design candy paper. :)
I created this with a Cricut Cartridge and svg cutting files from Kadoodle Bug Designs. I uploaded the svg files and designed everything in Cricut Design Space and cut the pieces as well as the tear bear bird pattern out of recollections cardstock. The embossed embellishments were cut from Bazzill Two Scoops cardstock.
The tear bear blur birdie was created from thick mulberry paper.
I added pearl and flower bling and detailed with gel pens and chalk.
Today I'm sharing a Christmas Tear Bear Bird Card.
I found this cute Little Santa Birdie svg cut file from Pretty Ribbons Pretty Paper. I uploaded the file to Cricut Design Space and cut it with my Cricut Explore.
I chose a piece of Doodle Bug Design from there super cutesy "Sugar Plums" collection for the background.
The Merry Christmas is a sticker from Sticko.
I made the tear bear bird by tracing the pattern I had cut with my explore onto the back of thick mulberry paper. I then cut out all the pieces leaving about 1/4 inch around all the pieces. I took a water brush and traced it around a few pieces and tore them out, I did this until all of my pieces were torn. Then I turned all of my pieces upside down and brushed them with a wire brush. I then chalked my edges with Dark Blue ink and assembled.
I used white mulberry for the hat and tore them both out of mulberry paper and chalked with Colorbox Charcoal Cats eye.
I assembled everything and took a soft brush to all of my fur.
I got the alcohol markers back out and made this card. I used Copic for her skin. As well as her shirt. I colored her boots, socks and shorts with Spectrum Noir.
My choices are limited with the alcohol markers, however my collection is starting to build.
For all the polka dots, and small detailing, I used gel pens.
I cut the base, ribbons, glitter paper pieces with my Cricut Explore.
The cute striped paper is from Doodlebug Design. I glued it all down with Fabri-Tac, it is my go to adhesive.
I made the card base in Cricut Design Space and cut it out with my Cricut Explore. It was super easy.
I took a square from basic shapes and made it 4x4.5, I then copied and pasted, so I'd have another identical square. I overlapped them a little and welded to make it all one large rectangle. I then brought in a score line, also from basic shapes. Added it in the center and pressed attatched and then cut. I used Recollections craft cardstock for my base.
I then made a 4x4.5 square and a small 1 1/2 x4 rectangle. I cut these out with two different patterned cardstock papers from Doodlebug Design.
I then used Basic Cricut Fonts and made my title in Design Space. I used my black cricut pen in my Cricut Explore pen holder and then cut it out.
I chalked all of this with Colorbox Chalk in Burnt Sienna. And then I glued it all down to my base saving room for my pumpkin tear bear. I added a super cute pop up sticker, also from Doodlebug Design and the perfect match for my Doodlebug Pumpkin Paper.
I found the pattern for my tear bear at Kadoodle Bug Designs. I just can get enough of the cute KBD patterns. I uploaded the pattern to Cricut Design Space and cut it out with my Cricut Explore.
I took this pattern and used a tracing tool to trace it all in the back of thick 150+gsm Orange Mulberry Paper. I then took my scissors and cut out each piece leaving about 1/4 inches around my trace marks to tare out my pieces.
I hand tore out each piece and then flipped the pieces face down and took a wire brush to them. Making sure it was all dry I chalked all edges in Colorbox Chalk Burnt Sienna.
I then assembled my bear using Fabri Tac, which is my go to glue. I did the face and added the pumpkin face to its body. I brushed it all again with a soft brush and attatched to the card.
Thanks for your visit!
Today this is my post on the Kadoodle Bug Designs Blog here:
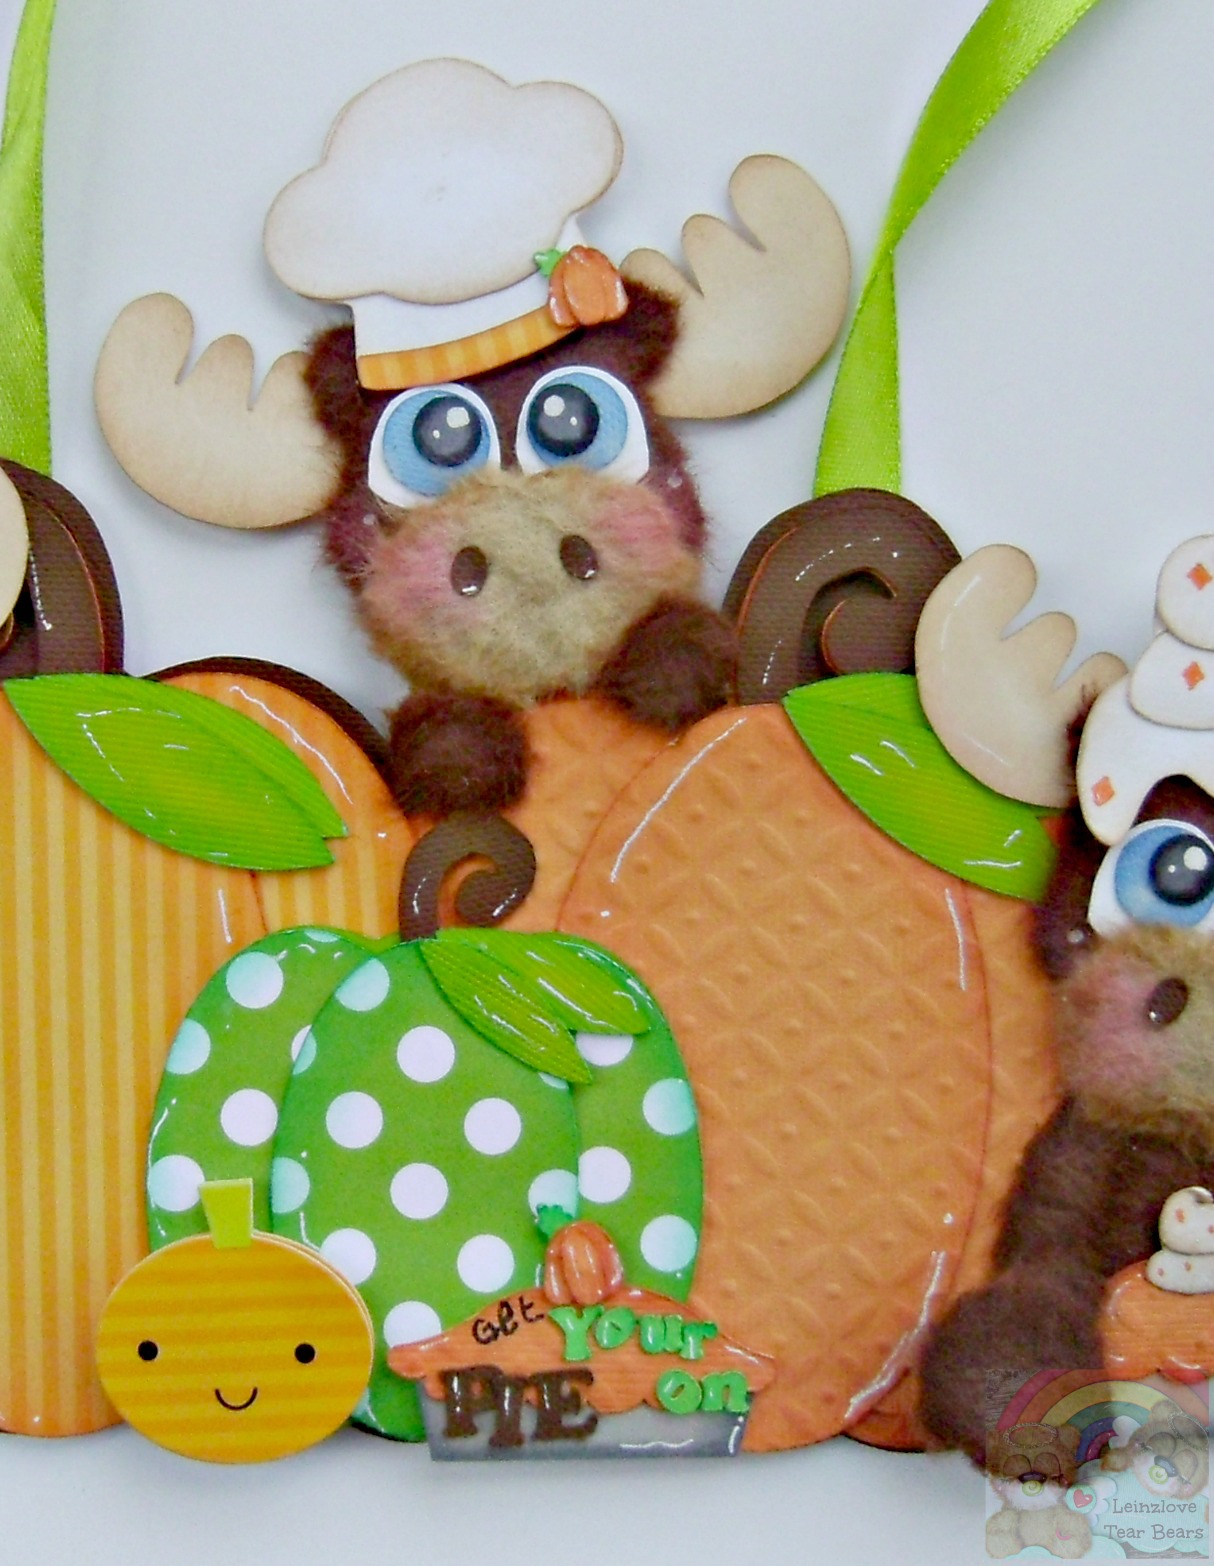
Today, I'm sharing this 3D Thanksgiving themed wall decoration. This was super fun to make.
I created the cute moose tear bears using the finest handcrafted mulberry paper. I found the cutest Pumpkin Pie file from Kadoodle Bug Designs. I uploaded it to Cricut Design Space and cut the pumpkin pie embellishments and tear bear pattern out with my Cricut Explore.
I found a cute pumpkin card file from The Cutting Cafe and decided to make it a wall decoration. The back is layered Cricut Brown Cardstock. This supports my decorations and makes it sturdy.
Two pumpkins were cut from coordinating Doodlebug Design paper. The cute little pumpkin pop up sticker is also from Doodlebug Design. All embossed pieces are cut Bazzill "Two Scoops" paper.
Video Trailer:
Check out my previous post to see the treat box created with Doodlebug Design.
This 3D project can be seen linked up over at the PDE Linky Party.
I made this pumpkin treat box using Doodlebug Design Cardstock. I also couldn't resist using a doodlebug design pop up sticker. It added that extra touch of cutesy!
I used the Halloween Treat Box Pattern from My Scrap Chick to cut this with my Cricut Explore.
I used ColorBox chalk in green and burnt sienna. I added other details with a white signo gel pen. This is project has been added in the PDE Linky Party going on here: http://pdelinkyparty.blogspot.com/ Cardz TV 3-D Designers Challenge #3 "Halloween Treat Holder" http://cardztv.blogspot.com/2015/10/cardz-tv-3-d-designers-challenge-3.html
Today, I'm sharing this tear bear easel card I created. I made this using different papers and sprinkles from Doodlebug Design. I added some paper flowers and heart cabochons.
The girly monster tear bear, the cake and presents were created with super cute svg cutting files from Kadoodle Bug Designs. I made this tear bear with thick mulberry paper.
I uploaded the files, and designed this project in Cricut Design Space, and then cut it with my Cricut Explore.
I tried something different to me. I made the tear bear monster first. And then I matched him with Doodlebug Design Paper.
This is my entry into the Cute Card Thursday Challenge found here: Anything Goes
http://cutecardthursday.blogspot.com/2015/10/challenge-396-anything-goes.html
Tear Bear Supplies:
*Thick Green Mulberry Paper (5x7 sheet)
*Tracing Tool
*Water Brush
*Soft Brush
*Wire Brush
Session 1: Choosing Supplies
I picked out my papers and embellishment decorations. I chose Doodlebug Design Cardstock in a Halloween Theme and found irresistible Pop Ups.
Session 2: Project Brainstorming
I went to www.kadoodlebugdesigns.com and chose which files I wanted to use. I couldn't resist going with The Frankies. I also decided I wanted to go 3D. I looked at haunted house 3D svgs and somewhere in the process I chose a church. I don't even know why, maybe the Frankies were "Just Married" in my mind.
I found a Church folding card from MyScrapChick and decided to make it a box where it would sit up.
Session 3: Designing in Cricut Design Space, Cutting the pieces with Cricut Explore
I placed the church card into Design Space, resized it to its required measurements. I attached all the windows from the file to where I wanted them on the box pieces. (So they would cut leaving me an opening for acetate sheet.) I cut an extra top panel to use for the bottom. This changed my card to a 3D box.
I used Doodlebug Design Cardstock and Recollections Cardstock to cut out all the pieces to my house. I did the same with the Frankies. (Including the patterns I used to make my Tear Bears.)
Session 4: Assembled House
I chalked all of the pieces using ColorBox Chalk and inks. I went with Charcoal for my Doodlebug Design Whimsy Web cardstock pieces and I used an old ink pad so it wouldn't go on darker than intended.
I went on to assemble and I noticed a designing mistake. I didn't attach the windows to the outer layer, so my windows weren't windows that went all the way through like I had wanted. I decided to leave it.
I cut acetate sheets in squares just a bit bigger than the windows and placed Scotch permanent mounting tape around their edges so they would be raised and have a see thru appearance. I placed spiders and stars inside. I then glued everything together with Fabri Tac (any glue can be used, but this is my go to.)
I happened to use to much glue on the back, which is a pocket. (BOOO, It looked awful!) So, I glued another panel over it and now it has two pockets. (I love this and am happy I learned something.)
I took my Doodlebug Design Pop Ups and had loads of fun placing them all over the church.
Session 5: Tear Bears
I took my bear parts and traced them into the back of thick mulberry paper. I tore out all of the mulberry paper pieces and let them dry. I sat it aside and chalked all of my Doodlebug Design cardstock pieces with Colorbox chalk in colors a bit darker than the piece I was chalking.
I went back to my fluffy pieces and brushed them while they were faced upside down with a wired brush. I chalked them with Green Colorbox ink. Afterwards I did my faces using gel pens, white Colorbox and brushed some pink from Peebles Chalk onto both Frankie Cheeks.
I went on to assemble all of my pieces with Fabri Tac. I took one last soft brush to all my furry tear bear pieces.
Session 6: Finishing Touches
I took my Signo white gel pen and added highlights to the whole project. I attached the Frankies to the church.
I took a few cotton balls and pulled them apart making them resemble cobwebs. They were placed without glue.
More Pictures:
Thank you for visiting! It was a pleasure to share this project with you. Twila
Hi everyone! Here is my first Bestie. I found Besties through a friend and can't get enough of all the cute doll stamps that I see on a regular basis. It was love.
I'm a relatively new stamper and I don't own a lot of markers. In fact 34 Spectrum Noir and 5 Copic Sketch to be exact. (With my skin tone colors arriving just the other day.)
I colored this doll face with Copics. R20, E00, E000, E21, E31. The outfit and everything else was colored with Spectrum Noir from the bright 24 set and the neutrals 6 pack.
The Copics are so awesome. I loved the brush nubb and also how well and easy they blend. I will no longer build my collection with Spectrum Noir.
*Svg Cut file from Little Scraps of Heaven Designs
I made these by uploading the Little Scraps of Heaven Designs file to Cricut Design Space. I cut out all the pieces to assemble from Cardstock. I took all of my cardstock bear parts and tore them from mulberry paper. I chalked every piece and assembled.
These were super hard as they took awhile getting the face into the center and not sitting on top.
These are currently available for purchase on Etsy:
I made these by uploading the Kadoodle Bug Designs file to Cricut Design Space. I cut out all the pieces to assemble from Cardstock. I took all of my cardstock bear parts and tore them from mulberry paper. I chalked every piece and assembled.
These are currently available for purchase on Etsy:
I made these by uploading the file to Cricut Design Space. I cut out all the pieces to assemble from Cricut Cardstock. I took all of my bear parts and tore them from mulberry paper. I chalked everything and assembled.
These are currently available for purchase on Etsy: